Interface with Arduino board using Node.Js
Words: 570 - (3 min read)
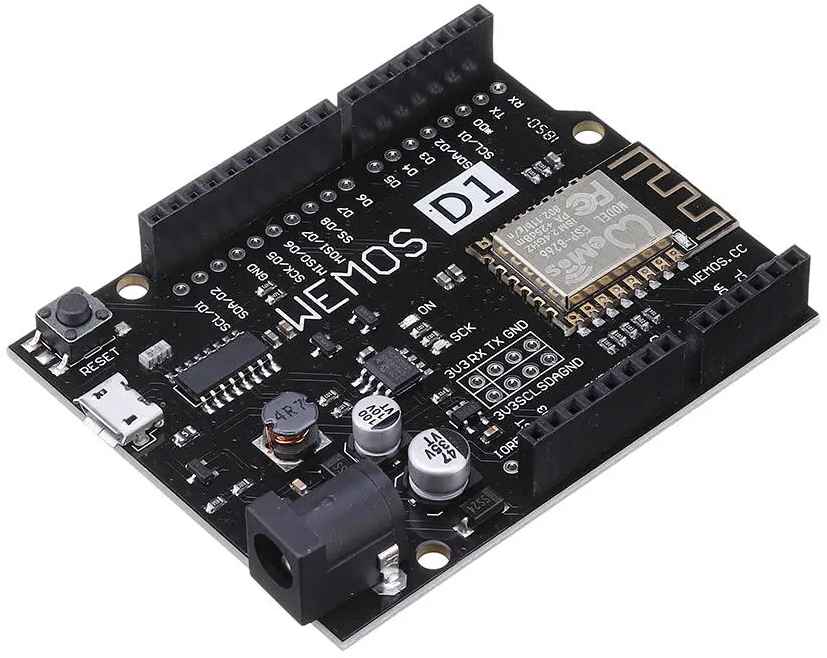
There are many cheap and solid Arduino compatible boards on the market which can be interfaced/controlled using Node.Js. Today we are going to focus on the WeMos D1 R2 board which can be purchased here.
This guide assumes you know your way around Node.Js and have it installed along with NPM.
Firstly you are going to want to setup your board in the Arduino IDE. We will be flashing some simple Wifi firmware to get it on your Wireless network then we can talk to it using Node.Js.
-
Select the board in the Arduino IDE:
Tools > Board > ESP8266 Boards > WeMos D1 R2 -
Plugin your board using a USB cable
-
Open the Wifi firmware:
File > Examples > Firmata > StandardFirmataWifi -
You are going to need to setup your Wifi SSID and Passphrase in the
WifiConfig.hfile. You shouldn't need to touch theStandardFirmataWifi.hfile at all. -
Scroll to the section which has the Wifi SSID configuration and enter the name of your Wifi network (SSID):
// replace this with your wireless network SSID char ssid[] = "your_network_name"; -
Scroll to the section which has the Security configuration and enter your passphrase or Wifi password:
#ifdef WIFI_WPA_SECURITY char wpa_passphrase[] = "your_wpa_passphrase"; #endif //WIFI_WPA_SECURITY -
Thats it. You can now compile and upload the code to your board using the
Uploadbutton -
Once that is complete, your board will reset and hopefully connect to your Wifi network.
-
You can now login to your router to check the Wireless clients and determine the IP address of your board. At this point you might like to reserve an IP address using the MAC address for your board so it doesn't change on restart and kill your Node.Js code.
-
Now we are going to setup our Node.Js code to do some simple requests/commands.
Install our dependencies
npm i etherport-client johnny-five --save -
Your
package.jsonshould look something like this:{ "name": "nodejs-test", "version": "1.0.0", "description": "", "main": "index.js", "author": "", "license": "ISC", "dependencies": { "etherport-client": "^0.1.4", "johnny-five": "^2.0.0" } } -
Now to our Node.Js code. We are going to make the little blue light flash which sits next to the silver
WeMoschip on our board:You will need to change the IP address to the one you found in step 9.
const { EtherPortClient } = require('etherport-client'); const { Board, Led } = require('johnny-five'); const board = new Board({ port: new EtherPortClient({ host: '192.168.0.201', port: 3030 }), repl: false }); const LED_PIN = 2; board.on('ready', () => { console.log('Board ready'); var led = new Led(LED_PIN); led.blink(); }); -
Now run your code and check the output in the console and the light action on your board.
You should see some output like this:
    1610519728478 SerialPort Connecting to host:port: 192.168.0.201:3030
    1610519728496 Connected Connecting to host:port: 192.168.0.201:3030
    Board ready
And some light action here:
